How to Create a Stylish News Preview with OGPik
A good-looking and well-structured Open Graph image can completely change how your links appear on social media or messengers.
For blogs and online media, it’s a key element that grabs attention before a user even reads the title.
In this guide, we’ll show you how to create a modern, eye-catching Open Graph image for a news or blog website using OGPik — step by step.
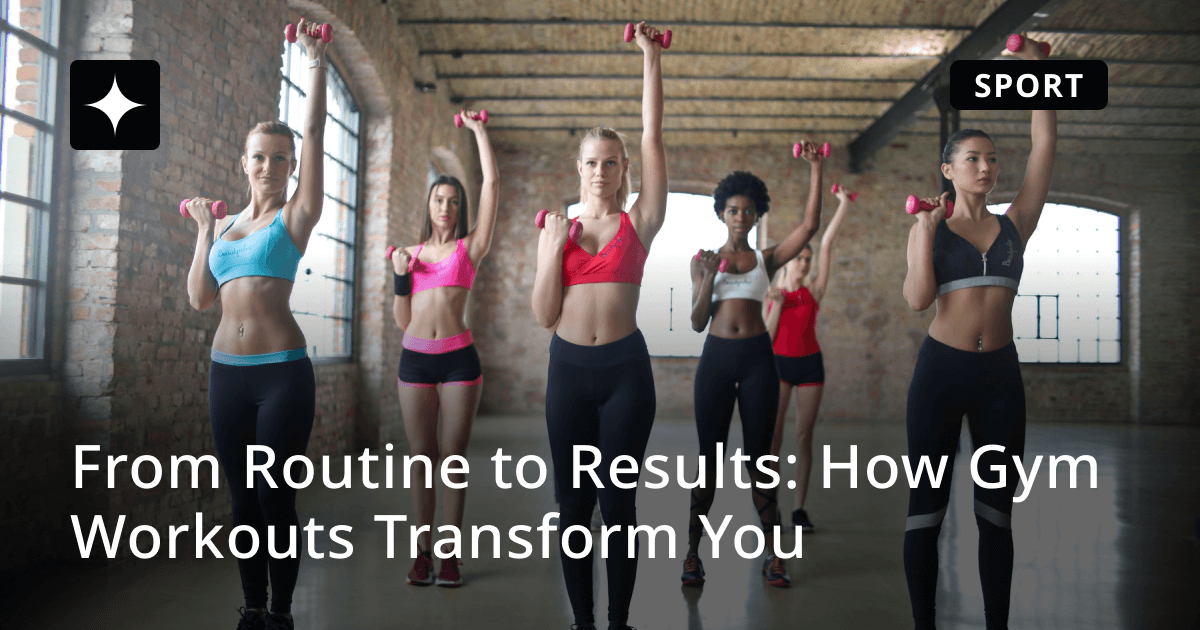
🖤 Step 1. Background and Overlay
Let’s start with the foundation — the background.
For a news-style design, a black background works perfectly, giving your image contrast and focus.
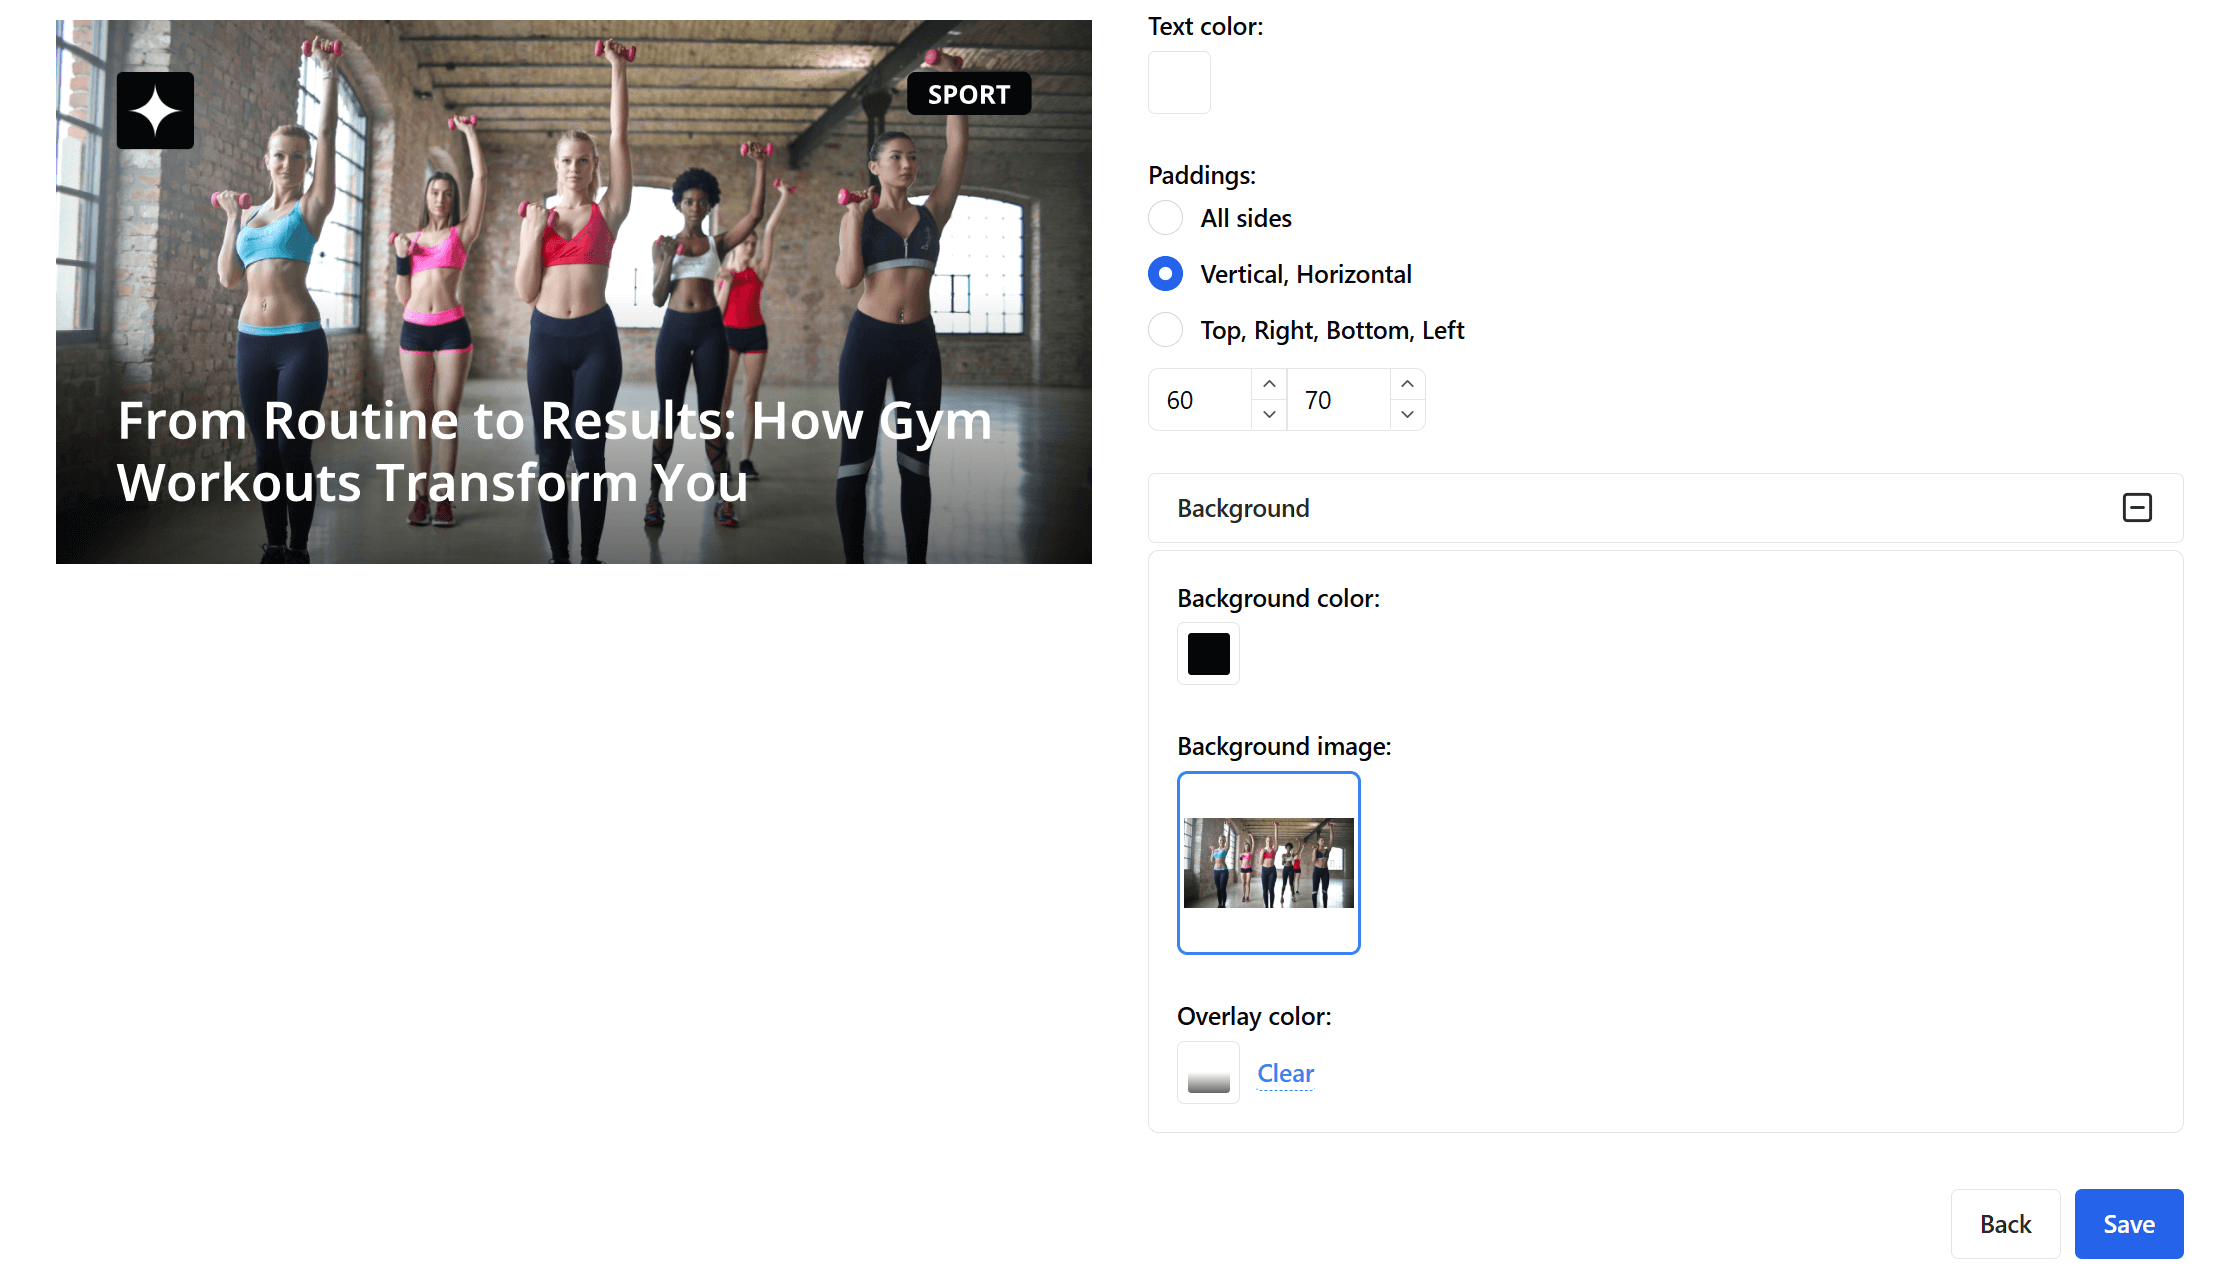
To make it more dynamic, we’ll add a gradient overlay:
- start color: black with 0% opacity,
- end color: black with 50% opacity,
- gradient angle: 180°,
- direction: top to bottom, starting from the middle of the image.
This adds a soft fade toward the bottom where the headline will stand out clearly.
Set the paddings to:
- 70 px on the sides,
- 60 px top and bottom.
Text color: white.
📰 Step 2. Add the Title
Now let’s move to the main part — the article headline.
Keep the default paddings and choose a clean, readable font (or upload your own).
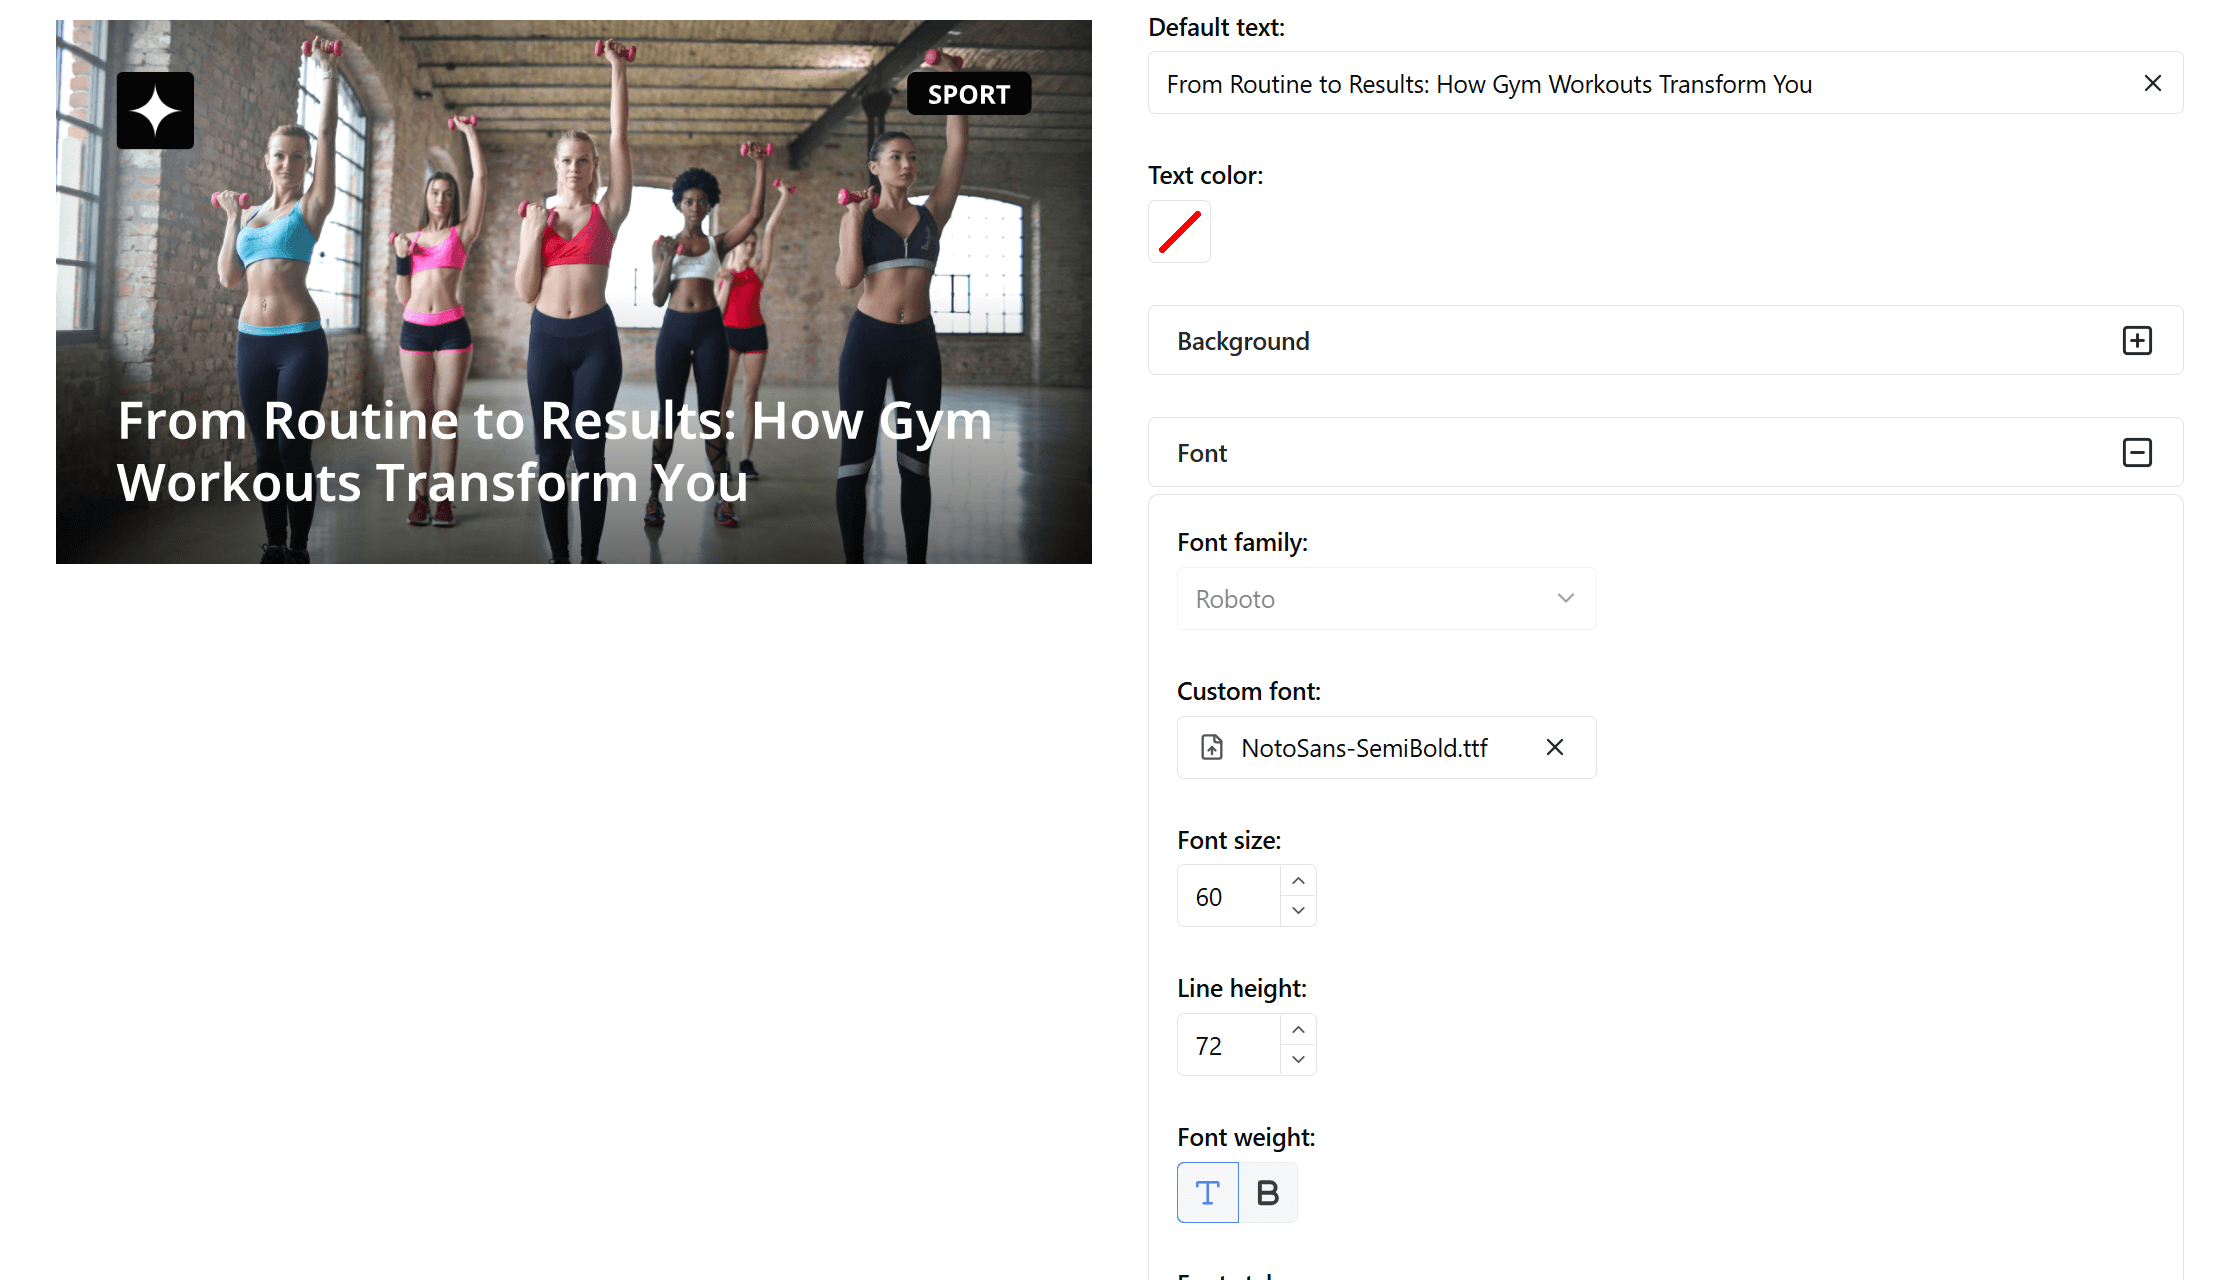
Recommended settings:
- Font size: 60 px
- Line height: 72 px
- Max lines: 2
- Position: bottom left corner
This placement ensures strong visual balance and great readability against the gradient overlay.
🏷️ Step 3. Add the Logo
Next, upload your publication’s logo.

Position it in the top left corner with default paddings.
This small detail immediately builds brand recognition and gives your image a professional look.
🗂️ Step 4. Add a Category Label
Now, let’s add a text block for the news category, such as “SPORT” or “TECH”.
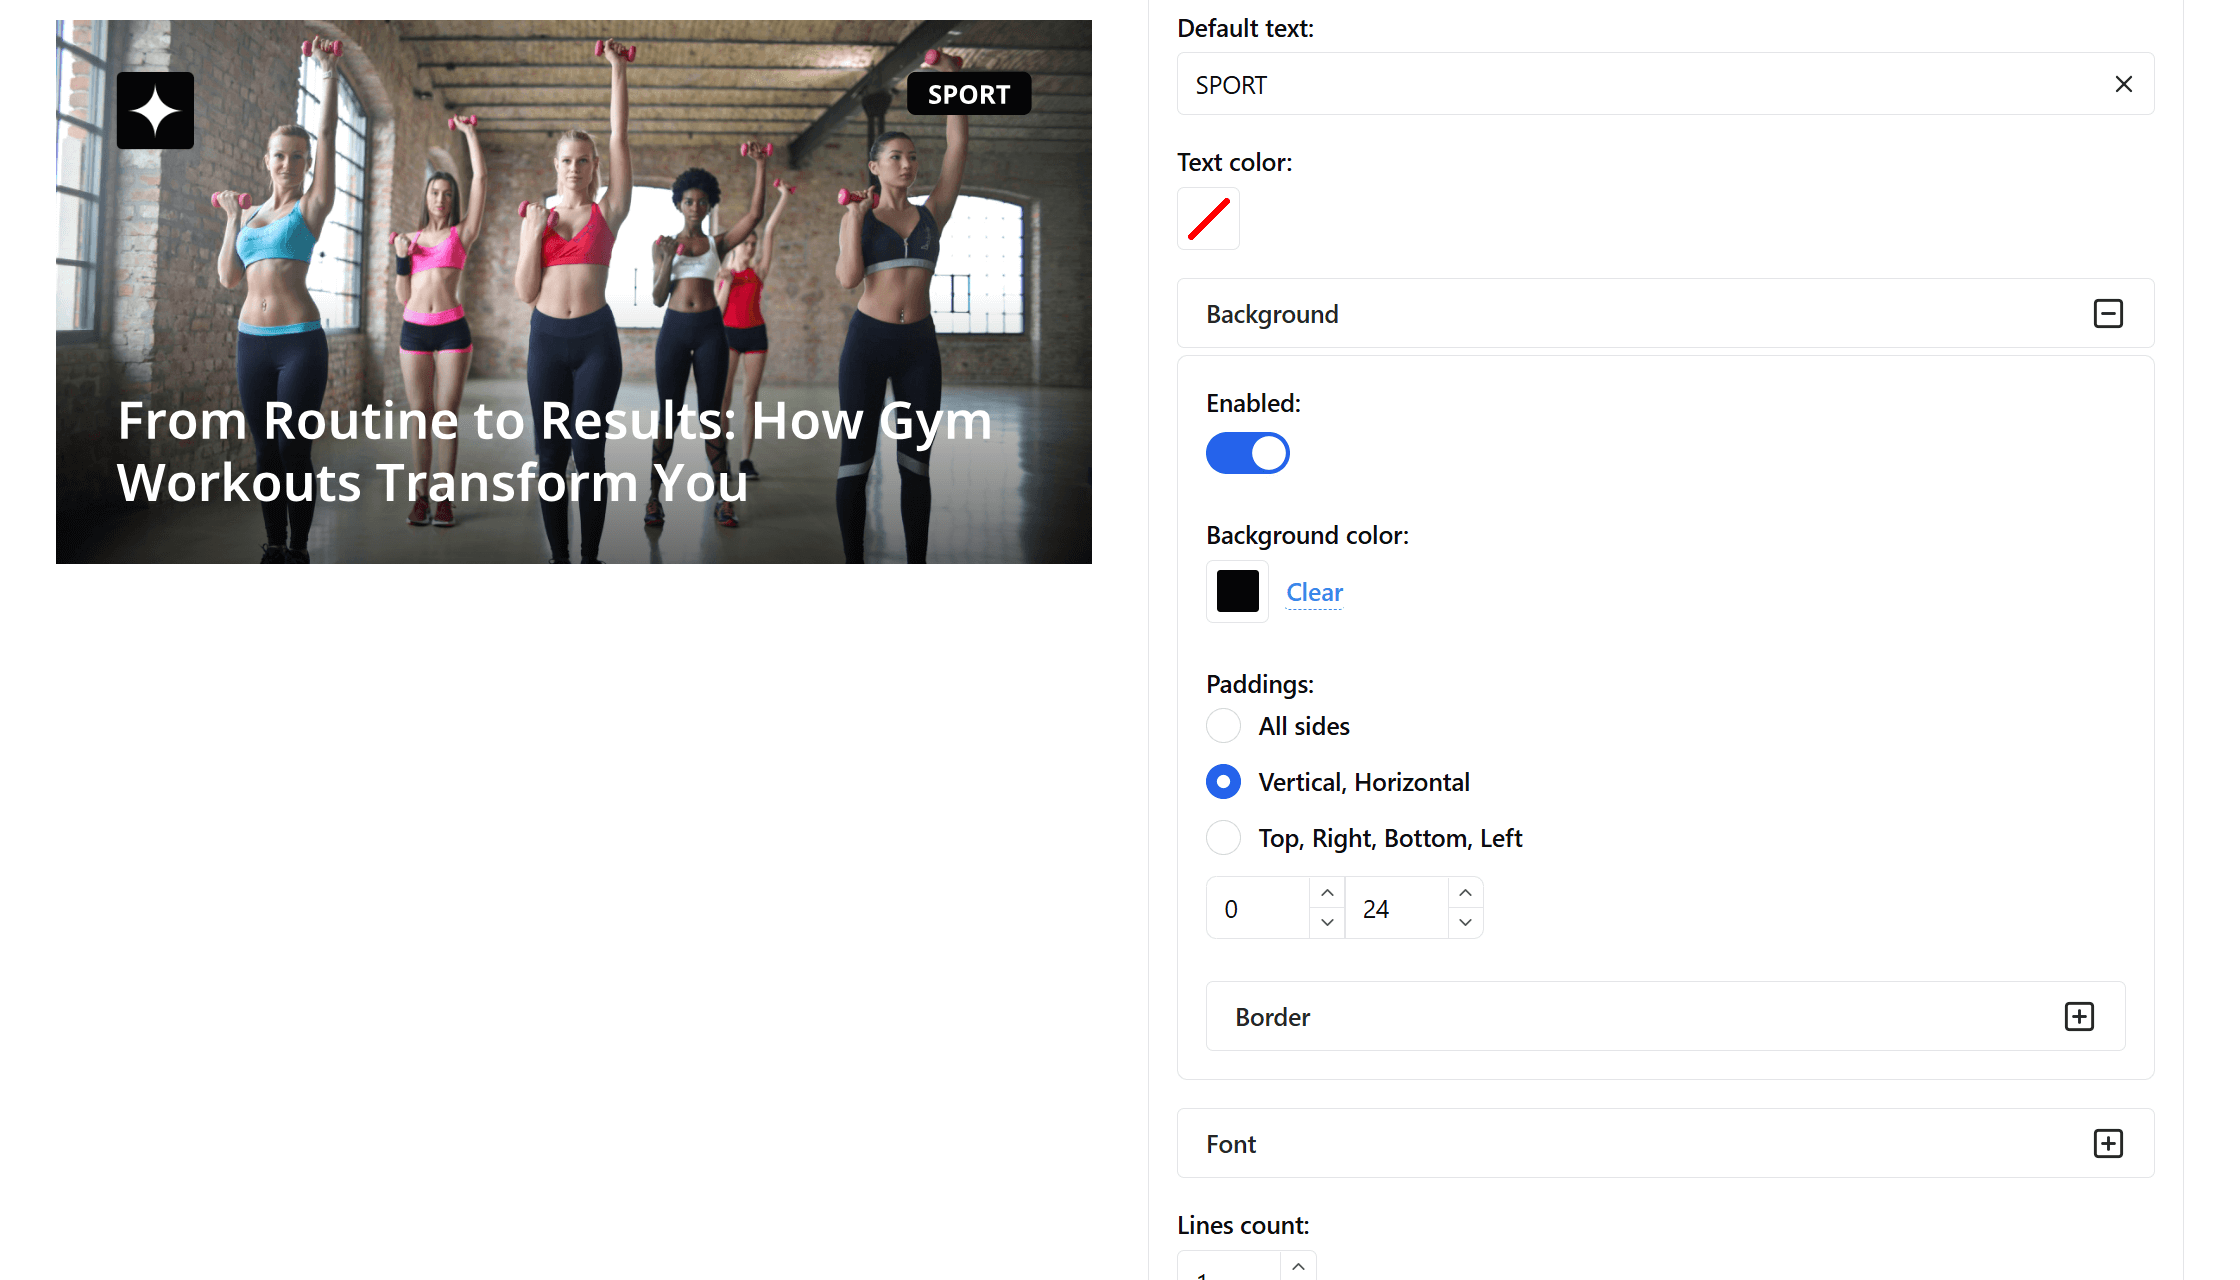
Use the following parameters:
- paddings — default,
- font — choose or upload your own,
- font size — 30 px,
- line height — 50 px,
- text alignment — center,
- position — top right corner.
Then, add a background for the text block:
- background color — black,
- inner paddings — 24 px on the sides, 0 px top and bottom,
- border radius — 10 px.
This makes the label stand out while keeping the overall design clean and balanced.
⚙️ Step 5. Integration
Once your template is ready, you can integrate it into your website using the simple OGPik JSON schema.
Add the following code to your page:
<script type="application/ogpik">
{
  "title": "From Routine to Results: How Gym Workouts Transform You",
  "image": "https://yourdomain.com/article/thumbnail.png",
  "texts": [
    "SPORT"
  ]
}
</script>
You can read sbout integration here.
OGPik will automatically generate an image for each page using your saved layout.
✨ Final Result
With just a few steps, your articles will feature branded, stylish, and highly readable Open Graph images.
This improves how your content looks in social media feeds and messengers, boosts click-through rates, and strengthens your visual identity.
Start building your own templates today at ogpik.com — it’s easier than you think!